Digital AOX conversion · runs in your browser

The full-arch conversion,
converted to software.

Load the pre-surgical scan, the wax-up and the photogrammetry scans. ArchConvert aligns them, locates every implant, and cuts the screw channels and interface seats into your wax-up — a print-ready provisional within minutes.

Convert and preview for free · $25 per finished case · no subscription, no seat license · ▶ PRESS START

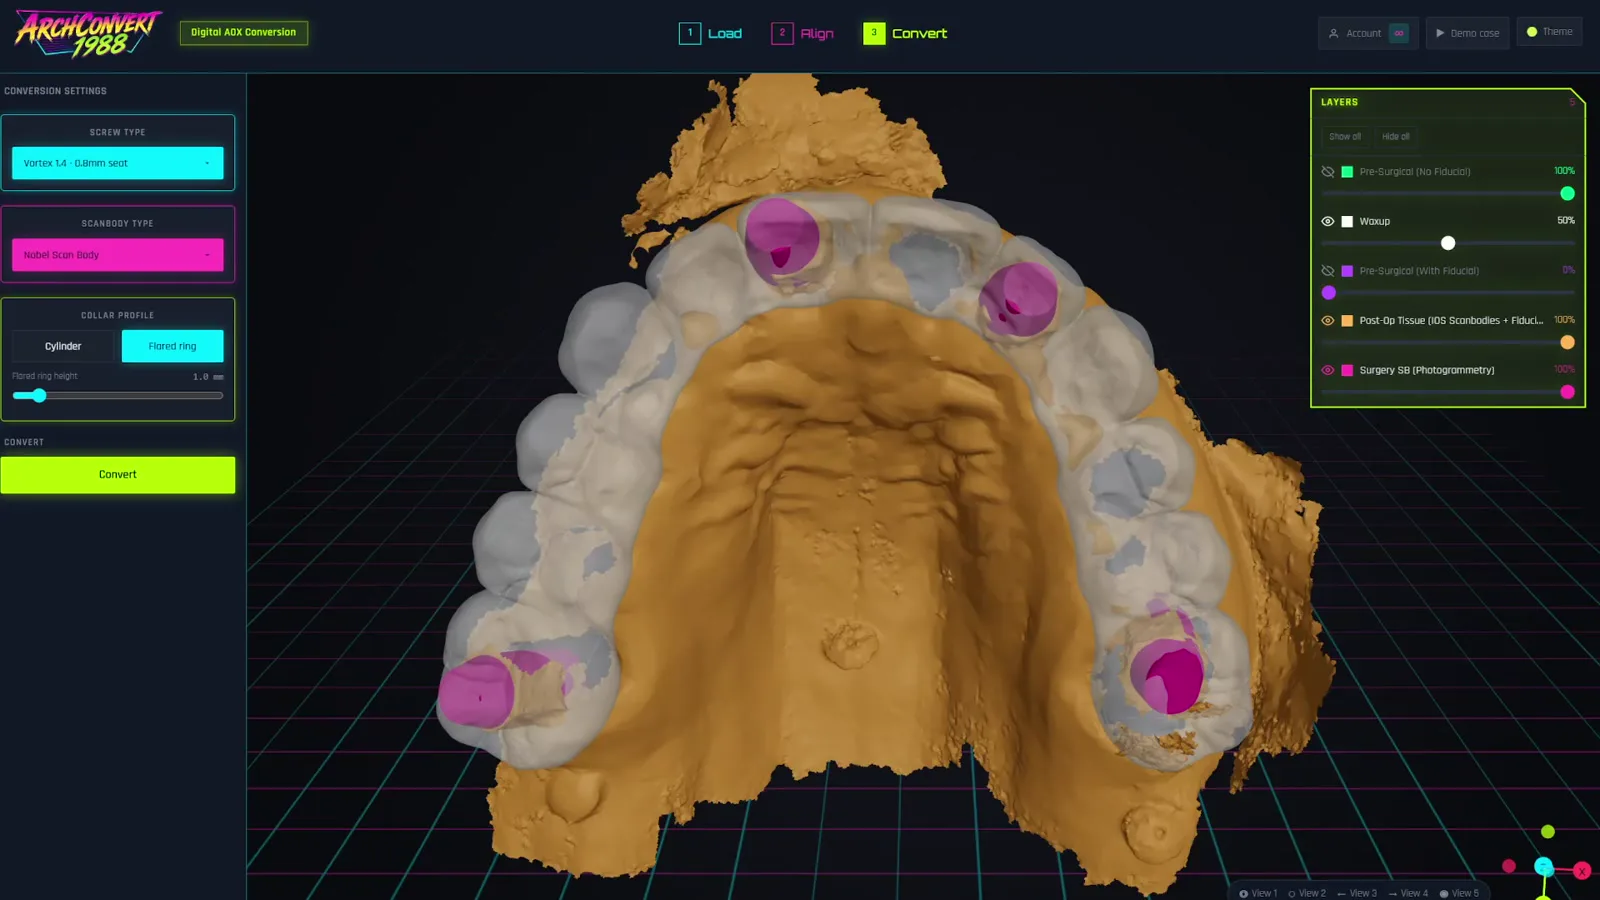
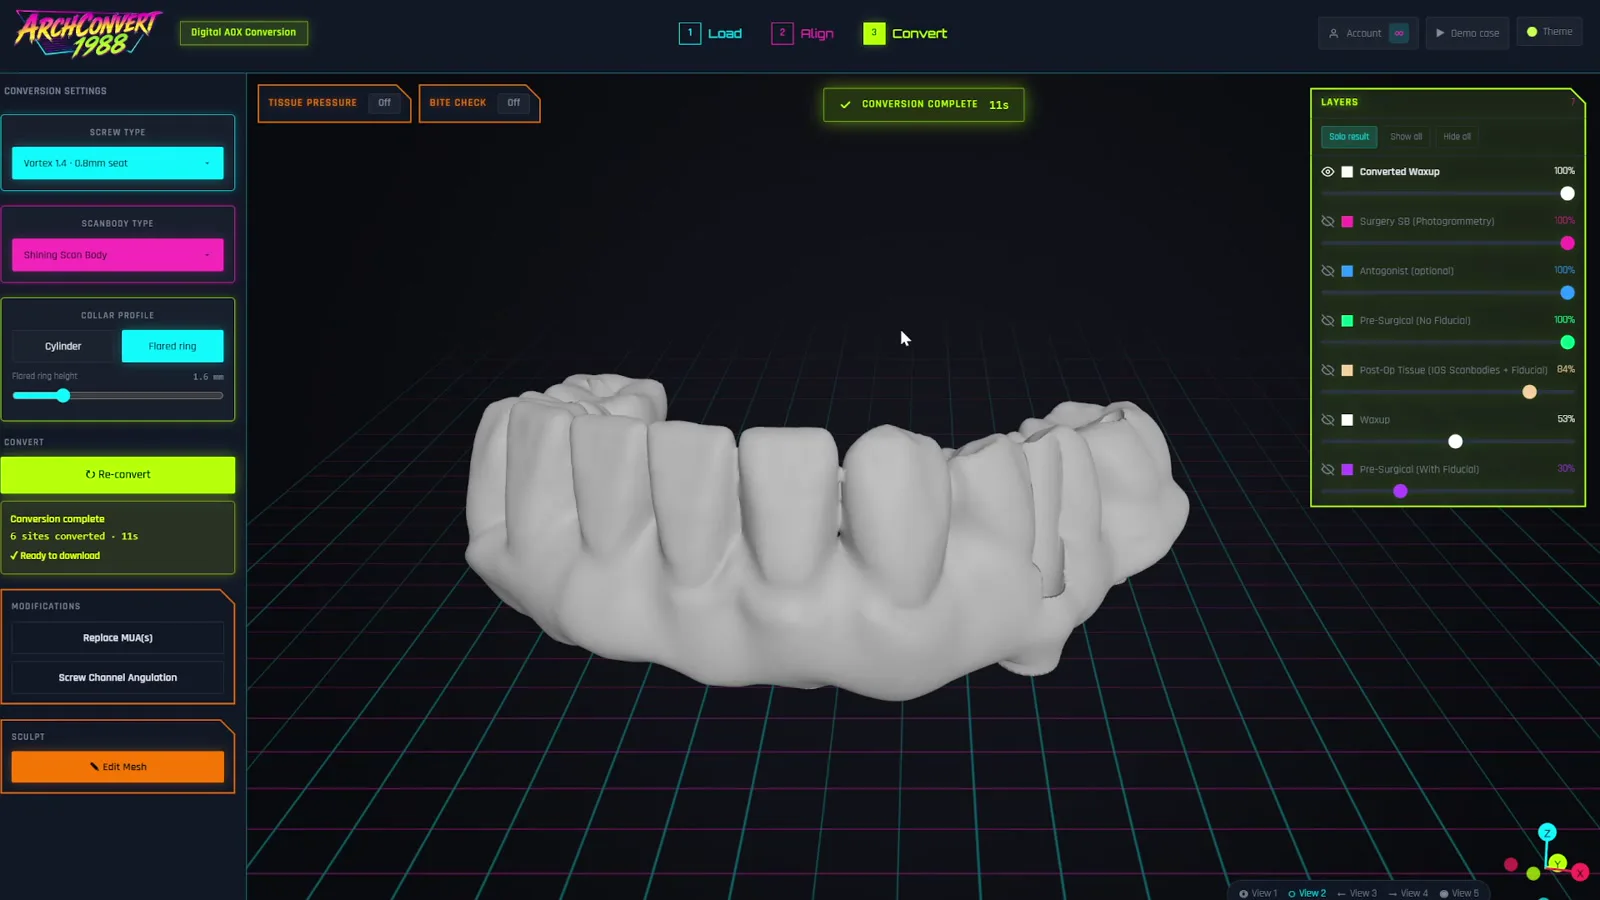
ArchConvert Convert step: aligned scans with detected implants and screw-channel preview
03 CONVERT · scan bodies detected · channels cut at the kit's rated angulationdemo case
3
steps: load · align · convert
7
sculpt brushes · channels lock
15
screw kits, angulation-aware
9
scan-body libraries · 3 photogrammetry systems
Workflow

Three steps. Streamlined to a few minutes.

Load, align, convert — the whole conversion runs in minutes on a laptop, and every step keeps the case on screen in a full 3D viewer: layers, opacity, five saved views, and a match heatmap whenever two scans meet.

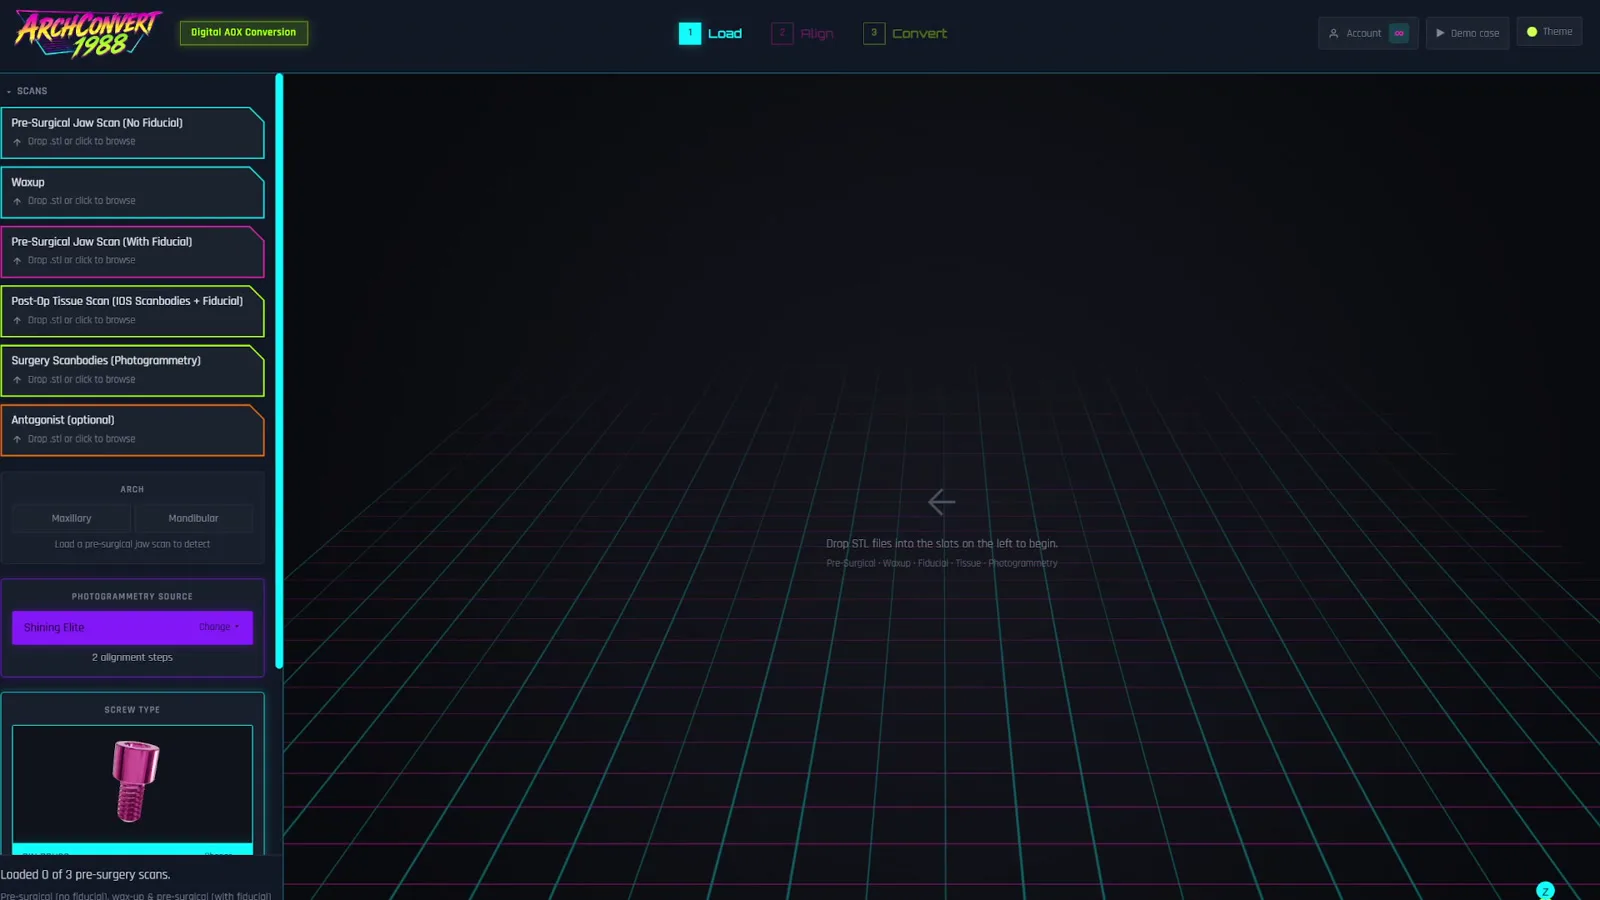
Load step: six scan slots and the photogrammetry source selector
STEP 01

Load

Drop your STLs into six slots: the pre-surgical jaw with and without the fiducial, the wax-up, the post-op tissue scan with IOS scan bodies, the photogrammetry scan bodies, and the antagonist.

  • Pick your photogrammetry source — ArchConvert already knows whether this is a two-step or three-step case.
  • Choose the scan body and screw kit once; they're remembered as your favorites.
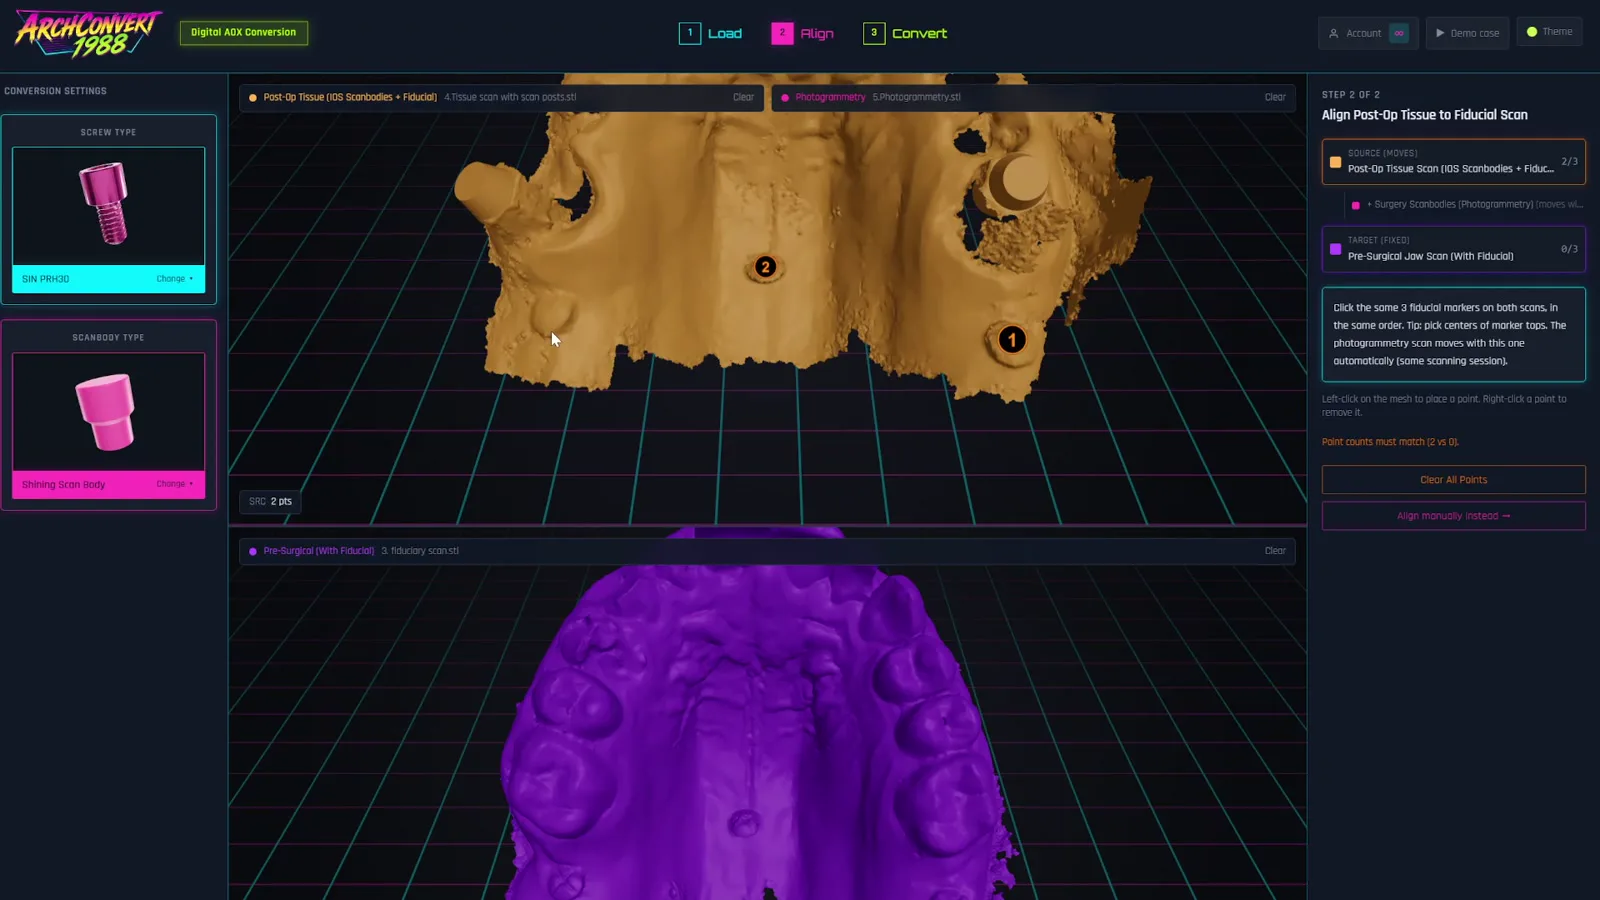
Align step: manual gizmo with live match heatmap and ICP refinement
STEP 02

Align

Pick three landmarks or position the scan by hand, then let ICP snap it home. A live 0–2 mm match heatmap shows exactly where the scans agree before you commit.

  • Kabsch coarse fit + landmark-neighborhood ICP, with RMS and max error reported on every step.
  • Review, adjust with the on-screen gizmo, or reject and re-pick — your points are preserved.
Convert step: detected scan bodies, collars and screw channel indicators on the wax-up
STEP 03

Convert

Press Convert: ArchConvert detects and aligns the scan bodies, builds the preview with emergence collars, then runs the finishing cut — screw channels at your kit's rated angulation and true interface seats. The heavy lifting — the boolean cuts — runs on our servers, not your laptop.

  • Then refine: aim any screw channel off-axis, sculpt the surface, check tissue pressure and bite — and re-cut for free.
  • Download the finished STL. Re-cuts and re-downloads of a paid case are free.
Create a free account

Sign up, load the demo case, run a conversion end to end — no card needed until you download.

After the cut

Then make it yours.

The conversion is the starting point, not the end. Two tools most conversion workflows leave to the bench happen right in the viewer — and every change re-cuts for free.

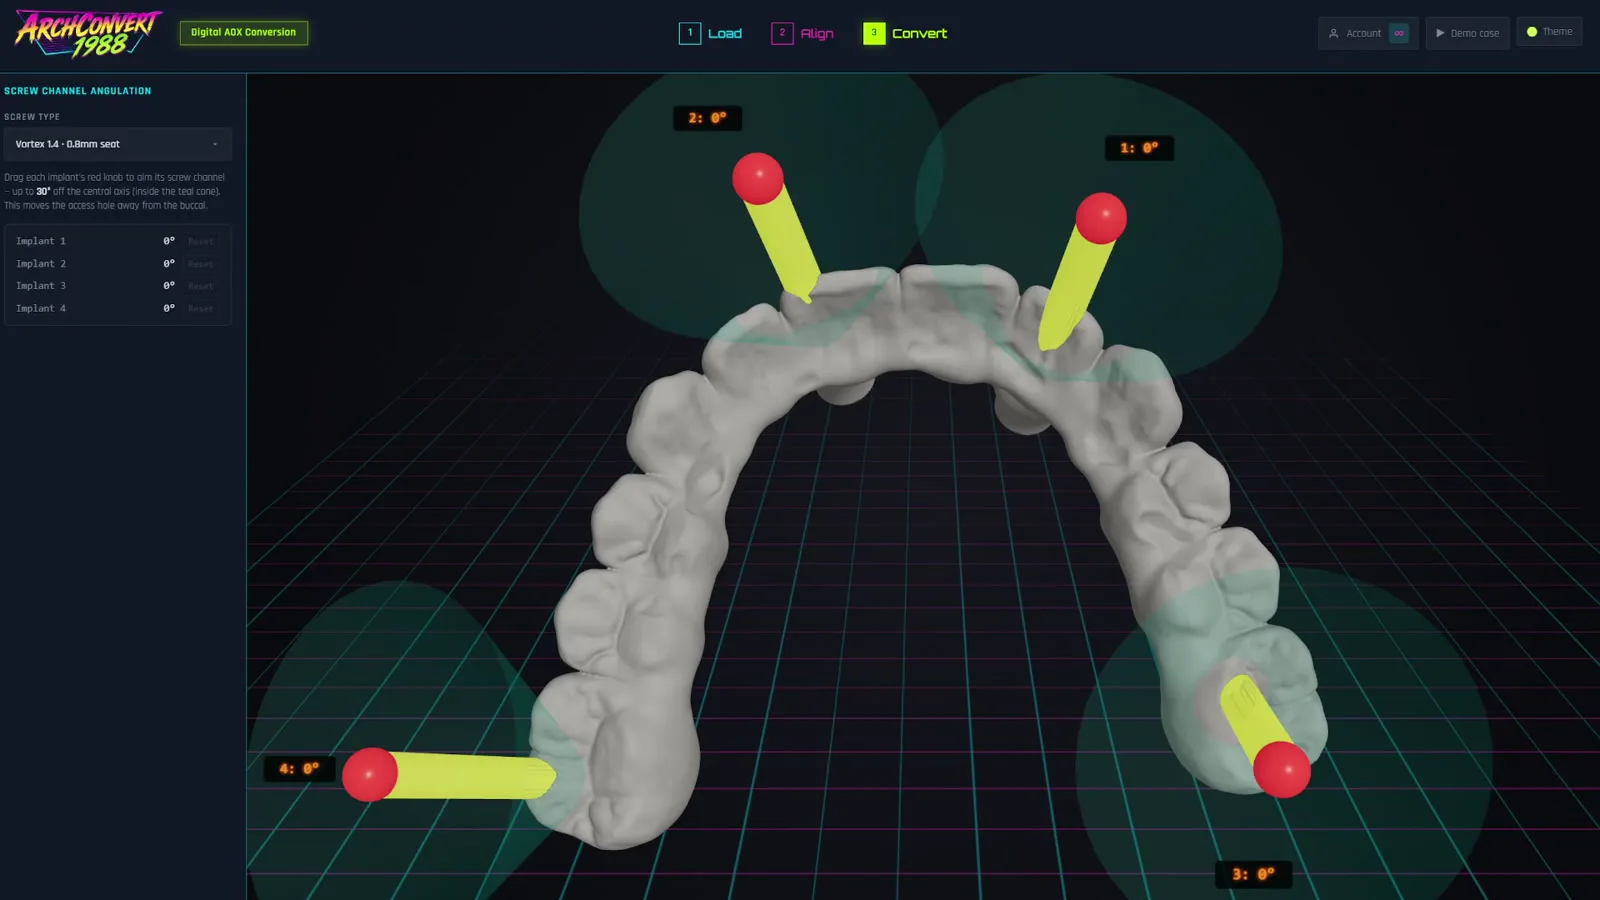
Screw channel angulation: per-implant cone showing the allowed tilt range with a draggable handle aiming the channel
CUSTOM ANGLED SCREW CHANNELS

Aim every channel. Stay inside the spec.

Each implant gets a 3D handle rising from its seat: a translucent cone showing the screw's allowed range, a channel-width cylinder along the current direction, and a knob you drag to aim it. Bring a facial exit around to the palatal, clear an anterior incisal edge, avoid a contact — the tilt clamps to the cone, so you can't design a channel the screw can't deliver.

  • Per-implant tilt and azimuth readouts; reset any site to straight.
  • Switch screw type mid-edit — channels re-clamp to the new kit's maximum.
  • Apply & re-convert cuts the real channels and interface seats at the new angles.
SIN Smart Angle 25°JD 30°Vortex 30°Powerball 20°Badger 12°
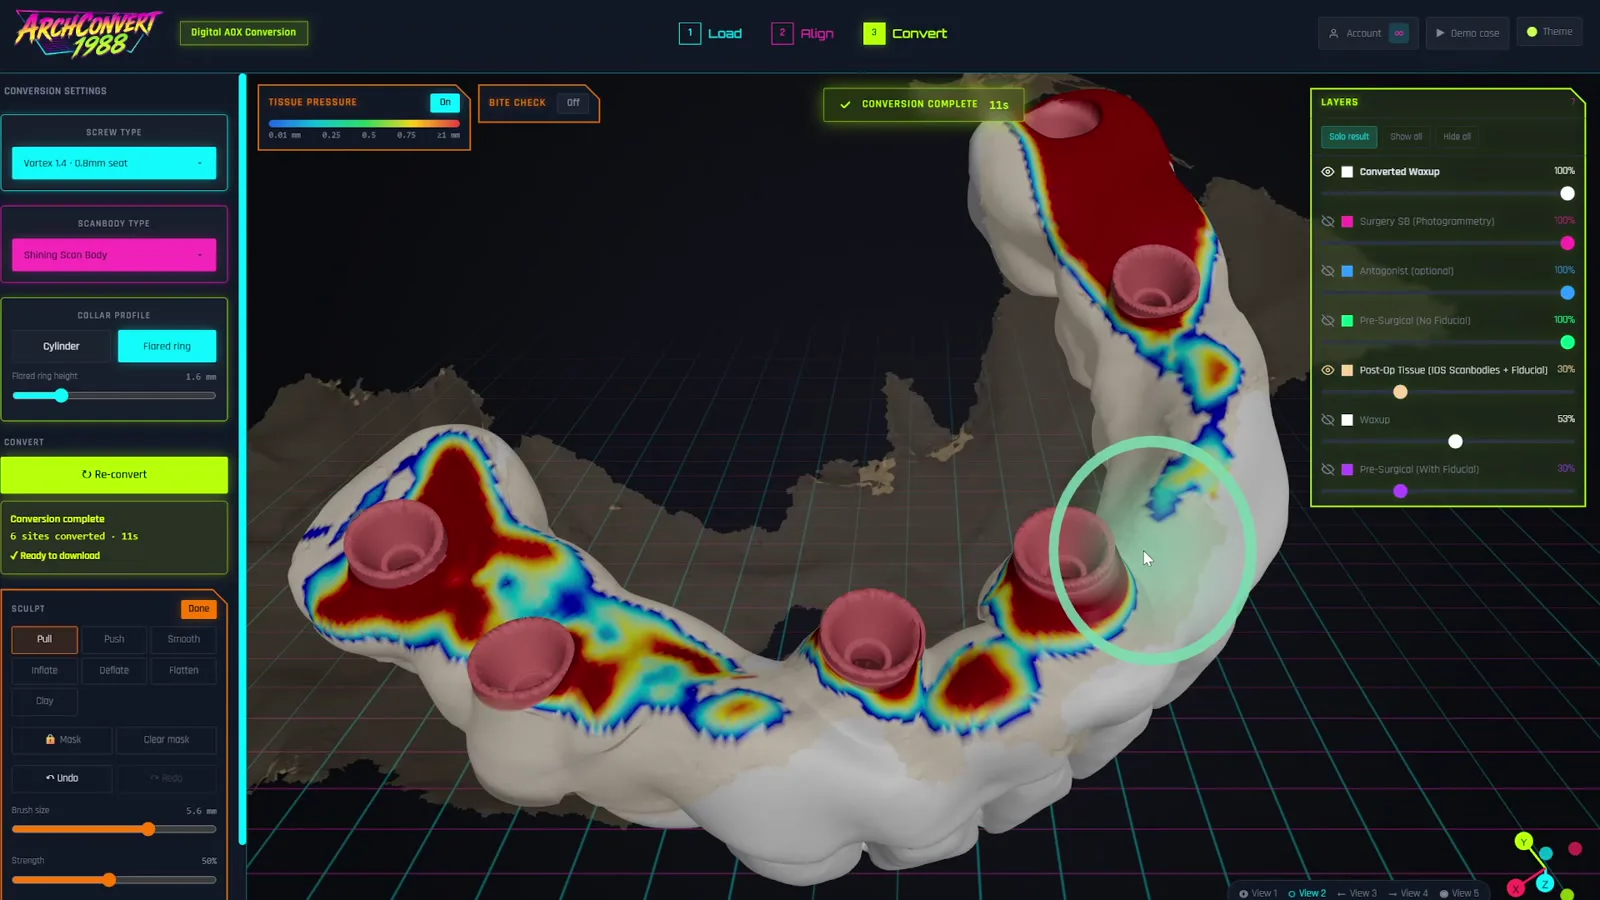
Sculpting the converted provisional with a brush; screw channels and interfaces shown as locked red zones
SCULPTING

Shape the provisional in place.

Press Edit Mesh and sculpt the converted wax-up with seven brushes — pull, push, smooth, inflate, deflate, flatten and clay — with adjustable size and strength, a paintable freeze mask, and unlimited undo. Relieve a flange, thin the palate, add bulk over a thin spot, soften a transition.

  • Screw channels and abutment interfaces are a locked zone the brush cannot touch — the prosthesis still seats on the MUAs.
  • Tissue-pressure heatmap shows intaglio penetration into the post-op tissue while you work; bite check does the same against the antagonist.
  • Happy? Re-cut and download — no extra credit on a paid case.
PullPushSmoothInflateDeflateFlattenClayLocked: channels + seats

Divergence check

When two implant axes diverge past the kit's limit, the sites light up red in 3D so you see which MUA needs a swap before anything is printed.

Replace MUA(s)

Swapped an abutment chairside? Drop the fresh photogrammetry scan, place two landmarks, and re-convert — the original scans are never touched.

Bite check

Load the antagonist and the converted arch's occlusal surface is scored against it as a heatmap — the same 0–2 mm ramp as tissue pressure — in review and while you sculpt, so a high spot is fixed before it is printed.

Try it on your next case

Angle a channel, sculpt a flange, re-cut for free. Then decide.

Compatibility

Speaks your hardware.

Real library geometry for every part — the scan body that's actually in the mouth and the screw that's actually going in the prosthesis. Don't see your system? Email contact@archconvert.com with the scan body, photogrammetry system or screw kit you use and we'll look at adding it.

Scan bodies

  • Shining 3DIOS
  • Nobel BiocareIOS
  • MicronMapper UnibodyPEEK 3.0
  • MicronMapper Split1.4 mm base
  • TruAbutment ioConnectHS Cap · Cone · AOT / URIS

Rotating 3D previews of every part in the picker.

Photogrammetry

  • Shining Elite2-step
  • TruAbutment ioConnect2-step
  • MicronMapper3-step
  • Any separate capture3-step

Select the source and the pipeline adapts — same session or separate tissue scan.

Screw kits

  • SIN PRH30 · Smart Angle25°
  • JD Screw30°
  • Badger MU · SRA12°
  • Powerball 1.0 · 2.0 · 3.020°
  • Vortex 1.4 — 0.8 / 1.0 / 1.2 / 1.4 mm seats30°
  • IPD ABR 0120°
  • Rosen All-on-T · URIS30°

Max angulation per kit; manufacturer torque shown in-app where published.

Why ArchConvert

Built chairside, not in a boardroom.

ArchConvert was built at Hope Dental Implant Center in conjunction with Hope Dental Lab, by a practicing dentist — Jared Gibby, DMD — and it runs on our own day-of-surgery cases. It does the one job well, and it does it in a browser tab.

Nothing to install

A WebGL viewer with layers, opacity, saved views and heatmaps. Open it on the design station, the surgical suite laptop, or wherever the case lands.

Pay when it's right

Convert, inspect the cut, check tissue pressure and bite — all free. A credit is only spent the moment you download the finished STL.

Your files stay yours

Uploads travel over single-use, time-limited encrypted links. The finishing cut runs on our servers and the result comes straight back to you.

Built to keep up

New scan bodies and screw kits are added as real library geometry, not approximations — MicronMapper and the latest angled-screw systems included.

Pricing

Per case. Not per seat, not per month.

One credit unlocks one case, forever. No subscription to justify on a slow week.

Single
$25
1 case · $25 / case

Try it on the next conversion that walks in.

Get started
Five pack
$100
5 cases · $20 / case
Save 20%

For the office doing a few arches a month.

Get started
Ten pack
$180
10 cases · $18 / case
Save 28%

For labs and full-arch practices.

Get started

What a credit covers: the server-side finishing cut and the STL download for one case. Re-cuts after an alignment tweak and re-downloads are free on a paid case. Credits are bought in-app by card and never expire.

⚠ Important notice

ArchConvert’s All-on-X implant-restoration design features are under development and have not been cleared or approved by the U.S. FDA. ArchConvert is a design aid intended for use by licensed dental professionals only; it does not diagnose, treat, or replace clinical judgment.

All output — alignments, screw-channel placement, interface seats, and any printed or milled result — must be verified by the treating clinician, who remains solely responsible for the prosthesis delivered to the patient. This same notice is shown in the app before every STL download.

FAQ

Questions from the bench.

What files do I need?

STL exports of the pre-surgical jaw (with and without the fiducial), the wax-up, the post-op tissue scan with IOS scan bodies, and the photogrammetry scan-body export. The antagonist is optional but recommended for the bite check.

Two-step or three-step photogrammetry?

Both. Pick your source on the Load step — same-session systems like Shining Elite and ioConnect, or a separate tissue scan with MicronMapper or any other capture.

Does it handle angled screw channels?

Yes. Each kit carries its manufacturer's maximum angulation, and channels are cut within it. The Convert step shows the exit of every channel on the wax-up before you commit.

Which scan body should I pick if mine isn't listed?

Email contact@archconvert.com and tell us what you use. Libraries are added as real geometry, and MicronMapper's Output Shapes can also export your scan bodies as any shape ArchConvert already fits.

Where do my uploaded files go?

Your scans don't upload at all — they're processed in your browser. Only the aligned wax-up geometry and the cut settings go to our server for the finishing cut, into a private encrypted bucket under a random id, and they're deleted after 30 days. Nothing about the patient is ever sent. Details in Privacy & your data.

Is this a subscription?

No. Buy a credit pack when you need one; unused credits never expire.

What about CBCT and wax-up design?

A CBCT + wax-up module is in development. The conversion module on this page is available today.

Ready when the surgery is

Load. Align. Convert.

Open ArchConvert, drop in the demo case, and run a conversion end-to-end before you ever buy a credit.